Drawing Ray Diagrams for Lenses
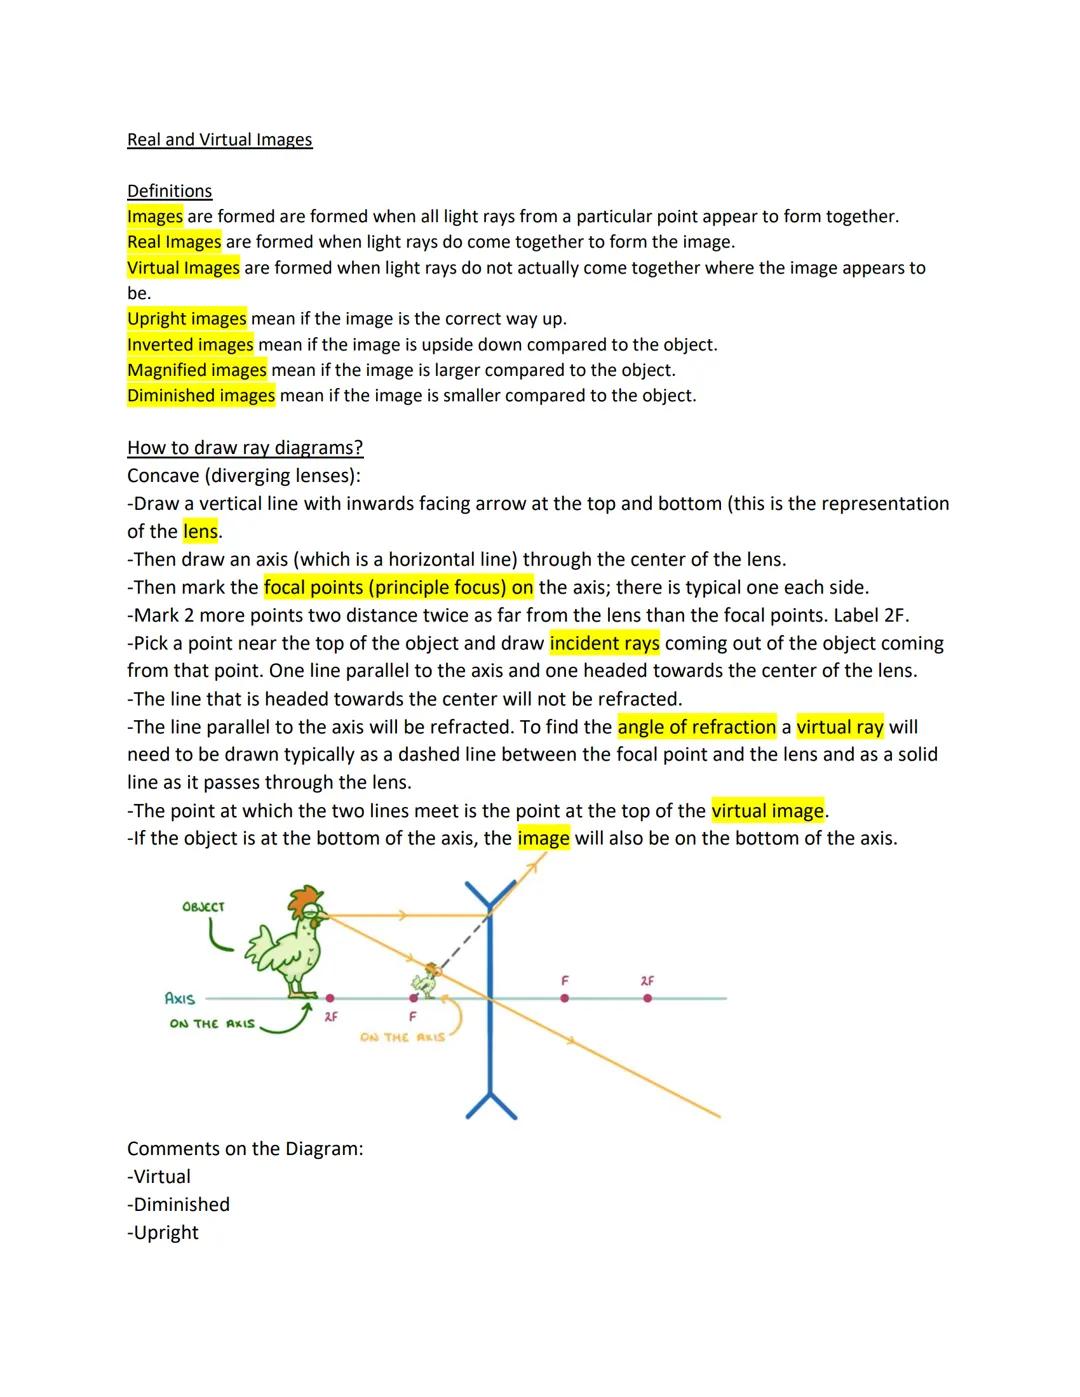
Concave lenses (also called diverging lenses) curve inwards and always create virtual, diminished, upright images. To draw their ray diagrams, mark the focal points on both sides of the lens, then points at 2F (twice the focal distance).
Draw two rays from the top of your object: one parallel to the axis (which gets bent away from the focal point) and one through the centre (which passes straight through). Where these rays appear to meet behind the lens is your virtual image.
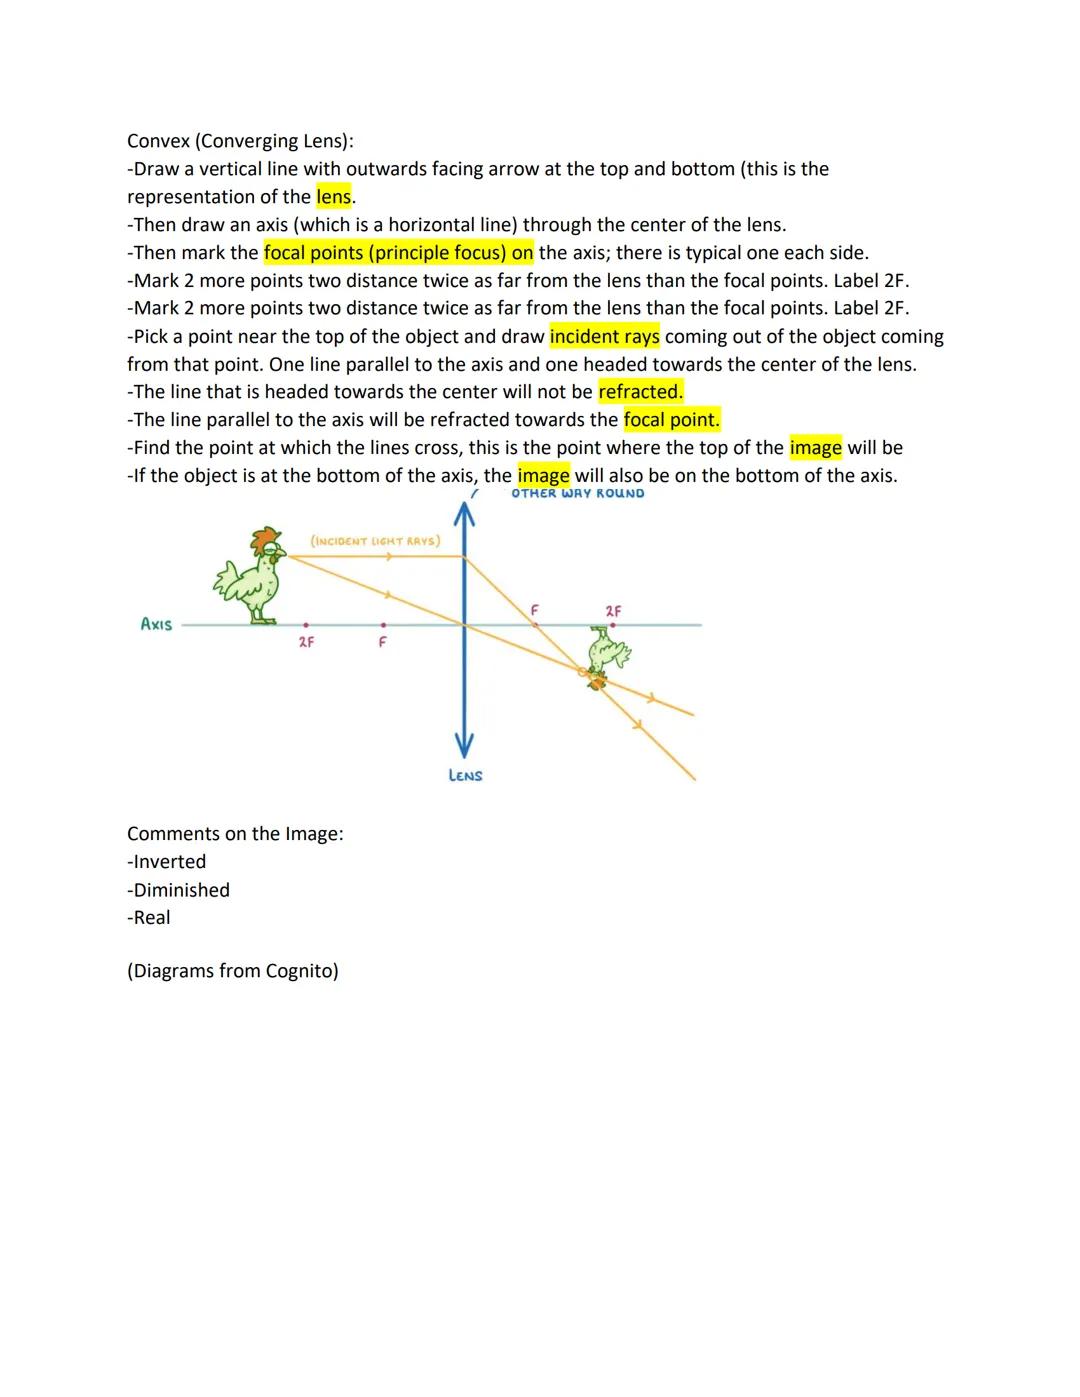
Convex lenses (converging lenses) curve outwards and create different types of images depending on object position. Using the same setup, draw your two rays - but this time the parallel ray bends towards the focal point on the opposite side.
When the object is beyond 2F, you get a real, inverted, diminished image. This is exactly how cameras and your eyes work! The light actually meets to form the image, which is why it can be captured on film or detected by your retina.
Pro Tip: Remember the phrase "Real images are always inverted" - this helps you check if your ray diagram is correct!